How to Network your Mac music system with the Raspberry Pi and HiFiBerry – Part 3
In my earlier articles on networking your Mac music system with the Raspberry Pi and HifiBerry DIGI+ (which I’m now calling just “PiStreamer”), I explained how to put the streamer together and get it going (Part 1) and how to set up a streaming architecture using it with your Mac (Part 2).
This article covers a number of miscellaneous topics that didn’t fit in the first two articles. It starts with alternative controllers, moves on to Airplay and Wi-Fi, and ends up with remaining topics in a “FAQ” format.
Lumin
In Part 2, I suggested using Kinsky as the controller. You can run it on your Mac as well as your iPad, and the interface is fairly simple and easy to explain (important to me in writing these articles!).
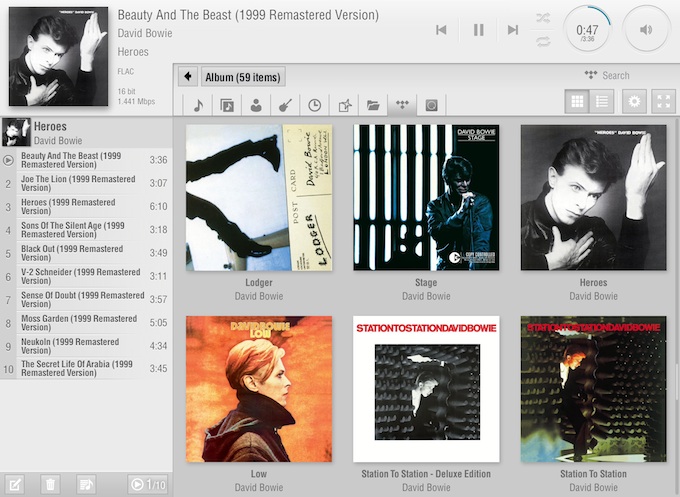
If you’re ready for something more sophisticated on your iPad, I suggest the Lumin app. It does everything Kinsky does, and then some. Here’s a sample screenshot:
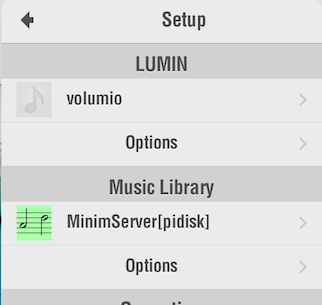
If you click on the “gear” icon, it will drop down a menu where you can select Volumio as the renderer to play to, and MinimServer as your music library (server):
BubbleUPnP (Android)
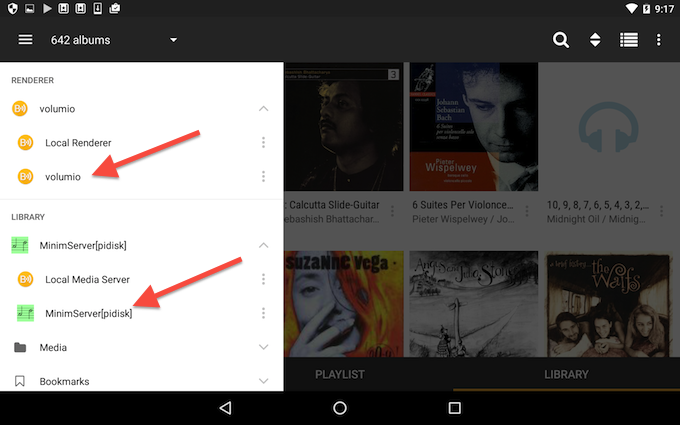
If you have an Android tablet, you can use BubbleUPnP as your controller. A full licence costs only a few dollars. Despite a couple of quirks (*1), it has the biggest missing feature from Kinsky: search. I recommend giving it a try. This screenshot shows the menu where you select the server and renderer, with the library view in the background:
You can also use your Android tablet to access the Volumio web interface, but there is a small complication – Android doesn’t understand local name resolution, so an address like “http://volumio.local” doesn’t work. You will need to find out the IP address of the PiStreamer, which you can do with a network scanning app such as Network Discovery.
Once you have the IP address, access the Volumio web interface in Chrome by typing e.g. “http://192.168.1.8” into the address bar. This address may change, so if the streamer refuses to respond, use Network Discovery to find out the new address (*2).
(*1) The first quirk is with respect to the Android back button. When you press the Back button while viewing the Now Playing screen, it goes back to the previous Android screen, not the previous BubbleUPnP screen. You remember after a while to only press the Back button while viewing the Library screen. The second quirk is that it tends to forget which library or renderer you are using, so you need to reselect them from the menu again when e.g. you start a new listening session.
(*2) If your streamer has a wired connection to the network, it is possible to set it to a fixed IP address. However, I don’t think this is really necessary, as the address doesn’t change very often.
JRiver
If you’re a JRiver fan, you will be pleased to know that you can send audio to the PiStreamer from your current JRiver library. If you want to play to the PiStreamer while sitting at your Mac, go to the Player menu, go to Zone, and select volumio from the list:

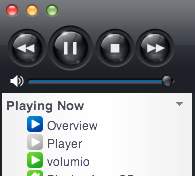
Then play an audio file as usual. You will see volumio with a green arrow in the Playing Now menu on the left:
You can also use JRiver as the library server. In JRiver, Go to the Tools menu, then Options and select Media Network. Enable the checkbox “Use Media Network to share this library and enable DLNA.” Follow the instructions to obtain an access key.
Now you can control playback from your tablet. In Kinsky, BubbleUPnP or Lumin, go to where you select a library and you will see JRiver appear as “computer-name (Generic DLNA).” Here is how it looks in Kinsky (left) and BubbleUPnP (right):
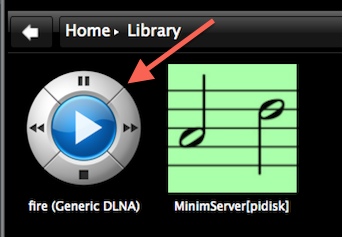
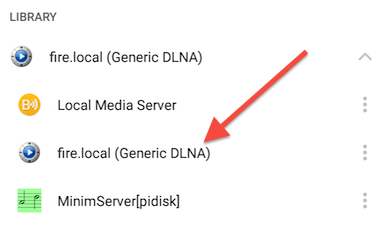
Alternatively, you can use JRemote (for iPad or Android). Use the access key obtained above to connect JRemote to JRiver (running on your Mac). Then toward the lower left, select Volumio as the “player,” like this:
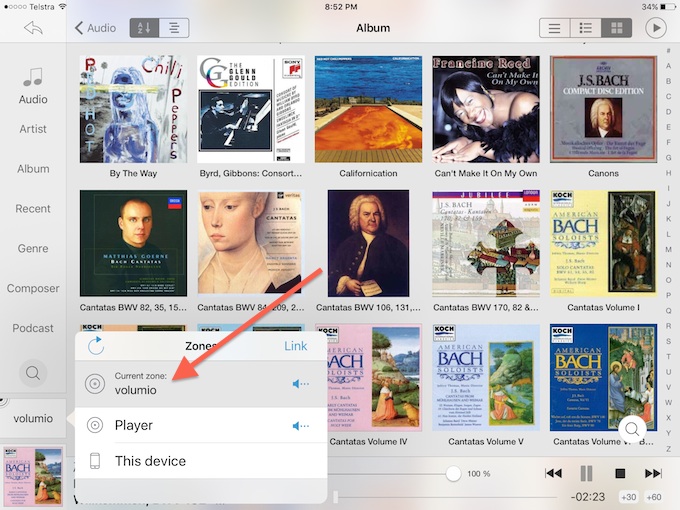
This works very well. Well done to the folks at JRiver! The main drawback (to me) is that you have to have JRiver running as a desktop application on your Mac. (In case you’re wondering if you can run JRiver directly on the Pi itself, yes you can. Hopefully I can cover that in a later article.)
Airplay
I was initially very enthusiastic about using Airplay to send audio to the PiStreamer:
- If you haven’t already, enable Airplay in Volumio’s System page, click Save Changes, and reboot.
- On your Mac, open System Preferences and go to Sound. Select Volumio as the default output device.
- If you are using an application that has its own audio output setting, you may need to set it to Volumio or just to “Airplay.”
- Play audio from your application.
When it works, it works well. The problem is that it can be hard to switch back and forth between Airplay and file (via UPnP) playback. I still haven’t figured out the magic incantation needed to make it work every time… so it can be a bit frustrating. (That’s why it’s well down in this article instead of at the top.) When going back to file playback, you may need to have the Mac “let go of” the streamer’s Airplay input, by setting the Mac’s default output device from Airplay back to something else (like the internal speaker), and quitting any application that has been set to output to Airplay.
In the end, I don’t use Airplay any more. Switching back and forth was too much hassle, and I dislike the long lag that Airplay seems to always entail. Mostly, I wanted it so I can send audio from a streaming service to the PiStreamer, but I’ve since figured out how to stream TIDAL directly to the Pi (more on that in a subsequent article).
Wi-Fi
Once you have the PiStreamer set up to your satisfaction, you may want to untie it from the wired (Ethernet) connection. (Note: it’s best to do all of your setup while still on the wired connection. That way, if you run into audio issues while setting everything up, you will at least know it’s not Wi-Fi causing it.)
Note however that Wi-Fi is not as reliable as a wired connection. Depending on where you are in your house, you may or may not get dropouts or stuttering. This will vary with the bit rate of the file you are playing. Your neighbours’ networks will interfere with yours, so the results may even depend on the time of day. One thing you can do to improve things is set your wireless base station to a channel that results in least interference from neighbouring networks. You can find out what channels are in use with an app like Wifi Analyzer (for Android). With that done, I had no trouble streaming 192 kHz and DSD directly to the PiStreamer over Wi-Fi.
To connect the PiStreamer directly to your Wi-Fi network, you will need plug a wireless adapter (“dongle”) into one of the USB ports. I used this dongle from eBay. There is also an official dongle, and a list of tested dongles here. (The Raspberry Pi 3 does have onboard wireless, but I have not tried that yet.)
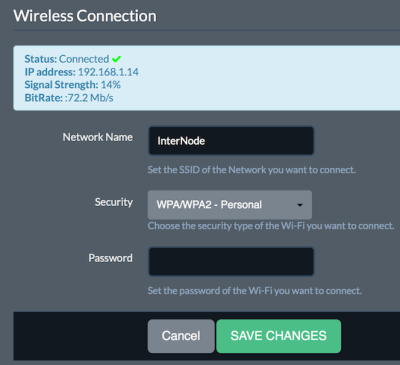
When you are ready to start using Wi-Fi, first shut down the RPi2. (Go to the Turn Off menu, select Power Off, and wait until the green activity LED stops flashing.) Remove power, plug the Wi-Fi adapter into the RPi2, and reapply power. Wait at least a full minute for it to reboot. Then go to Volumio’s Network page and enter the name and password for your Wi-Fi network.
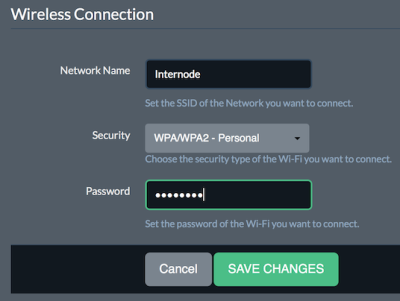
Press Save Changes. After a short time, the page should come back with the details of the Wi-Fi connection:
Shut down the RPi2 again. Disconnect the Ethernet cable and reapply power. Wait at least two full minutes, then try accessing the Volumio web interface again. Fingers crossed… Assuming that Volumio comes back, you can then check whether your audio is still working the way you expect.
The simpler and easier way to do this is to use an Airport Express. If you have more than one device to connect to the network, use a cheap network switch, like this for example. (I do this for my home theater system, so I can easily have several devices on the network without the hassle of trying to get them all connected directly via wireless.)
Renaming the streamer
If (like me) you think you might end up with more of these things on your network, you will need to rename them. This is simple to do. In the Volumio menu, go to the System page, enter the new name and click Apply. Then reboot it from the “Turn Off” menu.
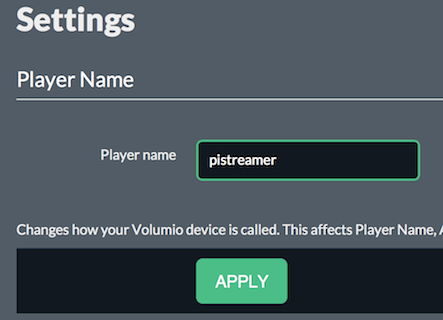
With that done, the new name should appear everywhere you can see the streamer from. The web address will be (for this example) http://pistreamer.local, the new name will appear in Kinsky or Bubble UPnP as a renderer, and on your Mac as an Airplay output device.
FAQ/miscellaneous
Can I power it from a phone charger?
I’m not sure I’d recommend it, but if you’re in a pinch, you can. While the Raspberry Pi Foundation recommends a 1.8A (minimum) supply, this is to allow for power-hungry things plugged into the USB ports. If you don’t plug in self-powered hard drives, a lesser supply is fine, as the board itself only uses about 300 mA. I had no issue running mine from a phone charger rated at 1A.
Can I power it from a powered USB hub?
Most likely. I had no issues with the hub I tried it with. (See above note about power usage.)
Can I use a linear power supply?
Yes. I now use one of these, it works well. (But see next question.)
I have a linear power supply but it has normal DC output connectors (not USB)…?
You need some of these.

Does the linear power supply sound better?
I thought so… although to be honest, I haven’t switched back and forth comparing. My reasons for avoiding (cheap) switching power supplies are as much to do with their mechanical noise as anything else. Also, linear power supplies make nice little DIY projects.
Do I have to use Volumio?
No, you don’t. I have found Volumio to be quite stable, but there are a boatload of other distributions. Two that are very similar to Volumio but have a nicer web interface (*) are RuneAudio and Moode Audio Player. You can use one of these in exactly the same way that I’ve described in these articles for Volumio.
(*) I barely use the web interface though, as I prefer using an iOS or Android controller.
Why not just use USB output to a DAC?
You can use a USB DAC if you like. One criticism that is often levelled at the Pi is that the USB and the Ethernet use the same interface chip. Supposedly this makes the USB output of lesser quality. I could barely tell a difference when I tried comparing, and I suspect that any audible differences are really down to implementation differences in the DAC that you use.
What if I use a USB cleaner/reclocker/regenerator?
I guess you could do that. I think, though, that it’s easy to lose perspective with this. Remember that you are using a “$35” computer here. By the time you add linear power supplies, nice USB cables, reclockers etc, you could be up to several hundred. To me, this kinda takes the fun out of it. You might be better off just starting with a device that is engineered for audiophile use (like this or this).
Why use an external DAC at all? (I see you can get DACs that mount right on the Pi.)
I’ve only tried one RPi-mounted DAC. But… unless you really need the convenience of an all-in-one box, digital output with an external DAC is what I recommend. I suspect that the onboard DACs are simply limited in what they can do by the power supply and susceptibility to jitter. Perhaps I’ll change my mind about this later on – if you compare it both ways please do post a comment below with your thoughts.
Acknowledgments
The author gratefully acknowledges the support of the following companies and individuals:
- HifiBerry, for providing the Raspberry Pi add-on board (DIGI+) and case used in this article.
- JRiver, for providing JRiver Media Center for use by HifiZine in articles like this.


Not sure what I am doing wrong with Lumin or Volumio setup — music plays but only the volume control of the now playing section in Lumin works (time ring is there but shows nothing, other controls are greyed out, ablum/song info is missing and the artwork shows Lumin logo) and the playlist sections does not show the songs queued. Let know if you know what I am doing wrong.
Lumin app 6.1.17 iOS
Volumio 2.806 Pi 4 with HiFiBerry DAC+ Pro
Please let me know with I might be doing wrong. I am trying to use Lumin as my control app, it works (connect to both music sever and renderer, browses the library and plays music) but the Lumin app only allow control of volume. The timing ring, other controls in now playing section of the app are blank or not operable. I can select music and add it to the playlist and it plays in the correct order but the playlist display area and controls remain empty.
Any ideas what I am doing wrong are appreciated.
Lumin App 6.1.17 iOS
Volumio 2.806 Raspberry Pi 4 w/ HiFiBerry DAC+ Pro
Thanks
William
John,
Please let me know with I might be doing wrong. I am trying to use Lumin as my control app, it works (connect to both music sever and renderer, browses the library and plays music) but the Lumin app only allow control of volume. The timing ring, other controls in now playing section of the app are blank or not operable. I can select music and add it to the playlist and it plays in the correct order but the playlist display area and controls remain empty.
Any ideas what I am doing wrong are appreciated.
Lumin App 6.1.17 iOS
Volumio 2.806 Raspberry Pi 4 w/ HiFiBerry DAC+ Pro
Thanks
William