Uploading your own content
Regular writers now have the ability to upload their own content prior to publication. This is now the preferred delivery method (although email is still quite acceptable, esp if requesting reviews of drafts), simply because it helps reduce the bottleneck that always occurs prior to releasing an issue. Some notes follow:
To start writing an article, just press the “Add New” icon under “Posts” at the left of the editing screen:

Enter a title before doing anything else:

You can then enter your text into the editing pane, as shown below. If you are only seeing a single row of editing icons in the toolbar, click on the “Kitchen Sink” icon at the right of the toolbar. If you are pasting in content from e.g. Word, use the special “Paste from Word” (marked below) icon rather than pasting directly in the editing window. This removes a lot of the junk markup Microsoft puts in. Otherwise, use the “Paste from Plain Text” icon to remove extraneous markup.

If you have only a few images, you might like to upload them yourself. Please firstly resize them to the size that you want them to display on the page. Then click on the button marked below – hopefully the rest will be self-explanatory. If you have a lot of images in the article, it’s probably better to let the publishing editor process them.

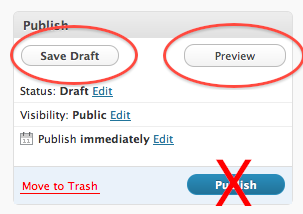
At any time, you can save your article as a draft, or view a preview of the article. Please do not press the “Publish” button! That will be done by the publishing editor as the final step to publish the issue.
 The excerpt of an article is what shows up on the issue’s home page. It is written separately from the article itself. Enter it in the box just underneath the main editing window:

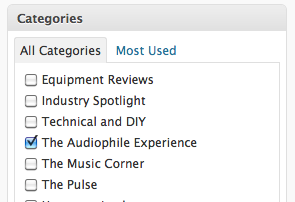
The article’s “department” is set over to the right side of the screen, underneath the Publishing box:

Finally, you might like to set the article authorship to yourself:

A request: please don’t use any of the controls on the screen other than those indicated above, as the publishing editor will do any that are necessary.